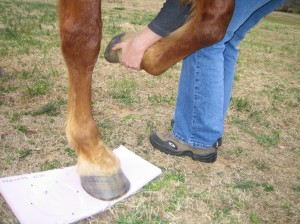
 Have you been thinking about hoof boots, but aren’t sure how to measure your horse’s feet so you can choose the correct style and size? Try using foam board to make hoof imprints, then measure the imprints instead of the hoofs themselves.
It’s easier to accurately measure a hoof imprint on foam board compared to a hoof attached to a living, moving horse. Once you’ve made the imprints, you can re-check your measurements without having to trek back out to the barn or pasture to visit your horse!
What supplies will you need?
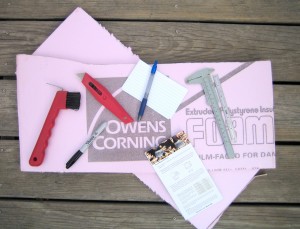
- 1/2-inch thick foam board insulation
- Razor knife
- Ruler or calipers, metric or inch scale
- Sharpie permanent marker
- Hoof pick
- Pen and notepaper
- Measuring instructions from hoof boot manufacturer
Ready to make and measure the hoof imprints?
1. Let’s get the prep work out of the way first!
You’ll need foam board insulation or sheathing, available in the building materials/insulation department at most home improvement stores. A 1/2″ x 4′ x 8′ sheet costs about $12 and is enough to measure quite a few hoofs with plenty left over for other projects.
Use the razor knife to cut a few smaller sheets from the foam board. A 9″ x 20″ sheet is a convenient size and is enough to measure two pairs of feet.
Park your horse in a stall or small paddock with plenty of grass or hay to keep him quiet and happy. If needed to keep your horse calm, have a buddy horse in the next stall or tied nearby. If in a stall, push the bedding to one side to leave a firm, flat surface. You can work in a grassy area or bare ground, but the grass should be short and the ground smooth or the foam board may break.
Clean your horse’s feet thoroughly with a hoof pick. Freshen up his trim if hooves are long or flaring, or make the imprints soon after a regular trim. If your horse is suspicious of the foam board, you may need to work with him until he’s relaxed and confident about standing on it.
2. Make a hoof wall imprint on the foam board.
Use the Sharpie marker to write the date and the horse’s name on the foam board. Ask your horse to stand with all four feet reasonably square. Lift up a hoof, and place the foam board on the spot where the hoof was resting.
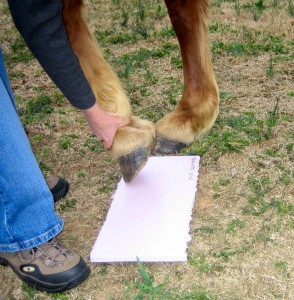
Place the hoof on the foam board and lift the opposite hoof for a moment to make a firm, clear impression.
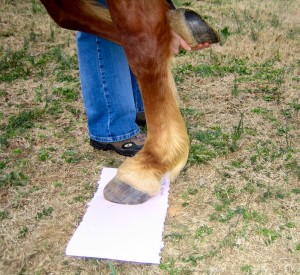
Try to make a single clear impression of the hoof wall in the foam, with no shifting or smudging. Lift the hoof back up carefully and pick up the foam board.

3. Mark the hoof wall imprint.
Use the Sharpie to mark five points on the outer edge of the hoof wall imprint:
- the two points of the hoof wall at the heel (heel buttresses)
- both sides of the wall at the widest point
- the center of the toe
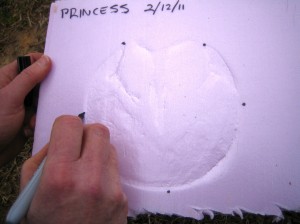
Note which hoof made the impression – Left Front, Right Front, Left Hind, or Right Hind.
4. Repeat for remaining hooves.
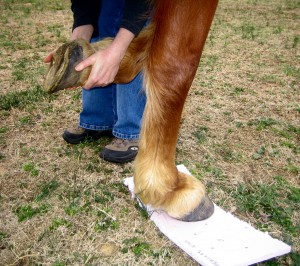
Repeat for the remaining hooves you’d like to measure. Flip the foam board over and use the other side to make impressions of the two hind feet. It is common to use hoof boots on the front feet only, so you may only need to measure the front two feet.
5. Make length and width measurements.
On each hoof wall imprint, use a straight edge to draw a line through the Sharpie dots marking the points of the hoof wall at the heel. You may also draw a line through the Sharpie dot at the toe.
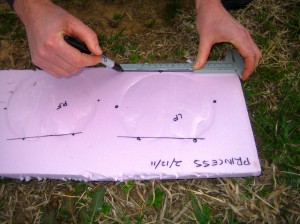
Using a ruler or calipers, measure and record the length of each hoof wall imprint from the line at the heel to the dot at the toe. Most hoof boot sizing instructions call for measuring the length of the weight bearing area of the hoof wall from heel to toe, so ignore the imprint of the frog and heel bulbs. Make measurements in millimeters or inches according to the measuring instructions from the hoof boot manufacturer.
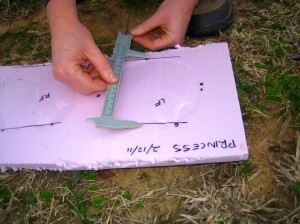
Measure and record the width of the hoof wall imprint at the widest point.
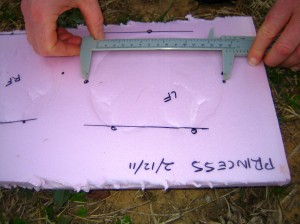
All done! Your completed foam board might look something like this:
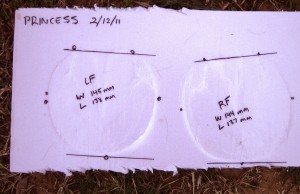
You may wish to record your measurements and any observations on notepaper as well as on the foam board.
6. Now what?
Have you already decided on a brand and style of hoof boot? Compare your measurements to the manufacturer’s size chart to select the correct size of hoof boot.
Not sure which brand and style of hoof boot is right for you? Your choice will likely depend on the size and shape of your horse’s hooves, and the intended use – short rides, long rides, therapeutic use, or other.
This helpful page from the EasyCare website has comparison tables and selection and fit guides to help you pick the perfect EasyCare boot for your horse and your sport. Or use the EasyCare Hoof Boot Size Calculator to enter measurements once and see which sizes and styles of boots may fit your horse.
Measuring the length and width of the hoof wall as described above is compatible with measuring instructions for EasyCare and Renegade hoof boots. Check out the article ‘Info about Hoof Boots’ for links to other hoof boot manufacturer web sites. Visit the manufacturer web sites to find instructions for measuring your imprints for other brands of hoof boots, and sizing charts to help you choose the right size.
Success Tips:
Take a digital photograph of your completed foam board to make a permanent record that you can store on your computer.
Hoof imprints in foam board can also be used to record and track changes in hoof shape over time.
Not sure what to do with leftover foam board? Cut into 8″ squares to keep in your hoof first aid kit. Foam board cut to shape and held on with duct tape works great for padding and protecting the soles of ouchy or abscessing feet.
Tags: Hoof Boots
